Coffee Bloom Explained: Timing, Ratios, and Why It Matters
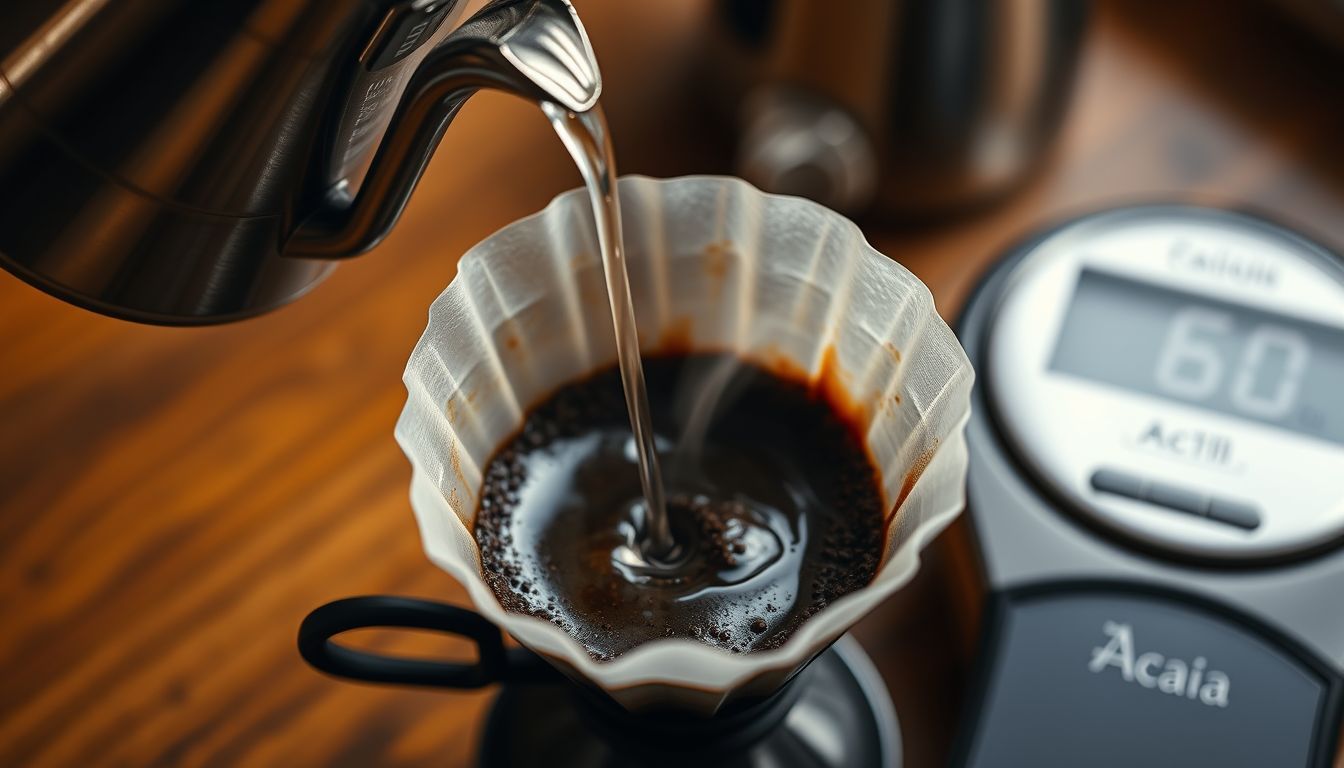
The moment your kettle stream hits fresh grounds, the bed swells and crackles—like Rice Krispies, but it smells like bergamot, hot cocoa, and orange zest. Lean in close and you can hear tiny pops as carbon dioxide escapes.

Those 30–60 seconds of waiting can be the difference between a silky, sweet V60 and a cup that is both sour and bitter in the same sip. Bloom can look like an optional step, but it works better when you treat it as a controlled pre-wetting stage.
With ultra-light roast profiles (think Sey, Tim Wendelboe) and a wide range of processing methods (anaerobic Colombians, honey Costa Ricans), bloom is not one-size-fits-all. This guide covers what bloom is, why it matters, and how to choose bloom timing and ratios that give you sweeter extraction.
1) What the Bloom Does
The science in plain language: degassing and wetting
Roasted coffee traps CO2 inside its porous structure. When hot water hits the grounds, that gas rushes out, forming bubbles that can physically block water from contacting the coffee evenly. Uneven wetting is the start of a lot of problems: channeling, patchy extraction, and that frustrating combo of thin sourness plus a harsh, drying finish.
If you’ve ever brewed a washed Ethiopian (say, Yirgacheffe) that smelled like jasmine and lemon candy but tasted hollow, bloom is a prime suspect. The aromatics are there in the fragrance—bright, citrus-forward, almost tea-like—yet the body feels watery because parts of the bed never extracted properly.
Bloom is your chance to do two things before “real brewing” starts:
1) Saturate all grounds so water can extract consistently.
2) Let CO2 escape so it doesn’t repel water and distort flow.
How roast level and freshness affect bloom
- Very fresh coffee (1–10 days off roast) often blooms aggressively. Nordic-style light roasts can look like a soufflé.
- Older coffee (3–6+ weeks) blooms quietly, sometimes barely at all, and can taste flat even with good technique.
- Dark roasts degas faster post-roast but can still release plenty of CO2 in the brewer—plus they extract quickly, so the bloom can’t be an excuse for over-agitation.
Picture a 5-day-off-roast Kenya from Onyx on a Hario V60, with the bloom doming so high it nearly touches the filter walls. With the same recipe and grind at 21 days off roast, the bloom barely rises, and the cup can lose that blackcurrant sparkle.

Actionable takeaway
Before you change your grinder settings, look at (and listen to) your bloom. If it’s violently bubbling and doming, plan for a slightly longer bloom or a more thorough wetting step. If it’s flat and quiet, don’t over-fixate on bloom; you’ll likely get more mileage from grind, water, or recipe.
2) Bloom Timing: The 45-Second Baseline and When to Change It
Start with 45 seconds
For most pour-over brewers—V60, Kalita Wave 185, Origami—a 45-second bloom is a reliable starting point. It’s long enough for noticeable degassing, short enough that you’re not letting the slurry cool into a sluggish extraction zone.
A practical baseline for light-to-medium roasts:
- Water temperature: 93–96°C
- Bloom time: 40–50 seconds
- Total brew time target: roughly 2:45–3:30 for a 250–350 g brew (depends on dripper/filter)
If you’re using a temperature-controlled kettle like the Fellow Stagg EKG or Bonavita variable-temp, set the number and commit to it. Without a stable temperature, it is hard to judge what a change in bloom time is doing.
When shorter works (20–30 seconds)
Shorten your bloom if:
- Your coffee is older and degasses less.
- You’re brewing a darker roast and bitterness creeps in.
- Your kitchen is cold and you’re losing heat fast (Chemex is notorious here).
Short blooms can keep energy in the slurry. That often preserves a rounder mouthfeel—more melted-chocolate than bitter cocoa husk.
When longer helps (60–75 seconds)
Lengthen your bloom if:
- The coffee is very fresh (especially 1–7 days off roast).
- You’re brewing an ultra-light roast that tends to extract unevenly.
- You’re tasting mixed sour + bitter notes, classic channeling territory.
A 60–75 second bloom can reduce that “sour first, harsh last” experience. The cup often shifts toward clearer sweetness—think ripe pear, honey, and a softer, tea-like finish.
Actionable takeaway
Do this two-brew experiment with the same coffee (same grind, same ratio):
- Brew A: 30-second bloom
- Brew B: 60-second bloom
Keep everything else identical and taste when the coffee cools slightly (around 55–60°C). If Brew B tastes sweeter and more even, your issue was likely trapped CO2 and uneven wetting—not your grind.
3) Bloom Ratios: How Much Water to Use
The simplest concept: bloom water should fully wet the dose
Bloom isn’t about “a little water.” It’s about complete saturation. If dry pockets remain, water will later race through the path of least resistance, leaving you with sharp acidity and a thin body.
A strong starting point:
- Bloom ratio: 2:1 to 3:1 (water:coffee by weight)
Concrete examples:
- For 15 g coffee, bloom with 30–45 g water
- For 20 g coffee, bloom with 40–60 g water
Many brewers lean toward 3:1 for very light roasts (like many coffees from Sey) because they can be stubborn to wet evenly. With a washed Ethiopia, that fuller bloom often helps the cup open up: the fragrance turns floral and citrusy, and the taste follows—lemon curd, apricot, a delicate black-tea structure.
Why too little bloom water can taste “hollow”
If you bloom 15 g of coffee with, say, 15–20 g of water, you’re basically making wet sand on the top layer while the interior stays dry. Later pours will not fix it and often worsen channeling.
The sensory result is familiar: an aroma that promises sweetness, but a cup that lands thin, sour, and slightly astringent—like biting into underripe plum skin.
Why too much bloom water can backfire
If your bloom water is huge (like 5:1 or more), you can start extracting early without enough structure from later pours. On some coffees—especially medium roasts or highly soluble anaerobic lots—you can pull bitterness and dryness sooner than you want.
This shows up as a cup that smells like strawberry jam but finishes with a drying grip, like over-steeped black tea.
Actionable takeaway
Pick one bloom ratio based on roast style and commit for a week:
- Light roast: start at 3:1 (e.g., 20 g coffee → 60 g bloom)
- Medium roast: start at 2:1 (e.g., 20 g coffee → 40 g bloom)
If your cups are consistently uneven, move up one notch (2:1 → 3:1). If they’re consistently harsh, move down (3:1 → 2:1) or lower temperature by 2°C.
4) Bloom Technique: Pouring, Stirring, and Agitation
Your goal: even saturation with minimal fines migration
Agitation is a tool. Too little and you leave dry pockets. Too much and you shove fines into the filter, slow the drawdown, and over-extract the tail end.
For a V60, this approach works well:
- Pour bloom water quickly but smoothly, aiming to wet all grounds in 5–8 seconds.
- Then do one small swirl of the brewer (not a tornado) to level and saturate.
- Let it sit until your target bloom time ends.
If you’re brewing with a grinder that produces more fines—like a Baratza Encore compared to a Comandante C40—go easier on swirling. A heavy swirl can compact fines into the filter and create that slow, bitter last minute.
Stirring the bloom: when it helps
Stirring can be useful when:
- You’re brewing very light roasts that resist wetting.
- You see obvious dry pockets on the surface.
- You’re using a flat-bottom brewer where even wetting matters a lot (Kalita Wave 185).
Use a gentle tool (a small spoon or a WDT-style needle) and keep it minimal: 2–3 gentle stirs. The goal is only to make sure every particle gets wet.
Common techniques
- Rao Spin: a controlled swirl after pouring to flatten the bed and reduce channeling (easy to overdo).
- Tetsu Kasuya’s 4:6 method: not a “bloom technique” per se, but it relies on consistent early-phase control; a sloppy bloom makes the rest unpredictable.
- Melodrip: reduces turbulence during pours; if you struggle with bitterness or stalled drawdowns, it can keep the cup cleaner and sweeter.
Actionable takeaway
Next brew, keep your recipe identical and change only bloom technique:
- Brew A: no swirl, no stir (just pour bloom water)
- Brew B: one gentle swirl after bloom pour
If Brew B tastes more even—less sour bite up front, less harshness at the end—your issue was incomplete wetting. If Brew B tastes more bitter and slow, your grinder likely produces enough fines that swirling is pushing you into over-extraction.
5) Putting It Together: Two Bloom-Forward Recipes (V60 and Chemex)
Recipe 1: Sweet, clean V60 for light roasts
This is a simple everyday recipe, especially for washed coffees like Ethiopia or Kenya.
- Brewer: Hario V60-02 dripper
- Coffee: 15 g (try a washed Ethiopia from Counter Culture or a Kenya from Onyx)
- Water: 250 g (ratio 1:16.7)
- Temperature: 95°C (light roast)
- Bloom: 45 g for 45 seconds (3:1)
- Pour to 150 g by 1:15, then to 250 g by 2:00
- Aim to finish around 2:45–3:15
What you’re looking for: a cup that smells like citrus blossom and black tea, tastes like stone fruit and honey, and finishes clean instead of papery-dry.
Actionable tweak: If it’s sour and thin, keep everything the same but extend bloom to 60 seconds. If it’s bitter, reduce temperature to 93°C or check out our guide on how to fix bitter pour-over coffee for more troubleshooting tips.
Recipe 2: Chemex with a longer bloom
Chemex can make an aromatic cup—think chamomile, lemon zest, and a silky, almost filtered-juice texture—but it’s also a heat sponge.
- Brewer: 6-cup Chemex with bonded filters
- Coffee: 30 g
- Water: 510 g (ratio 1:17)
- Temperature: 96°C (hotter to offset heat loss)
- Bloom: 90 g for 45–60 seconds (3:1)
- Pour in slow pulses, keeping the slurry level consistent
Actionable tweak: Preheat aggressively. Rinse the filter with plenty of near-boiling water, warm the Chemex, then discard rinse water. If you skip this, you’ll often taste a muted cup with a faint papery dryness.
Conclusion: Treat the Bloom as a Small Experiment
Bloom is the quiet part of brewing where you set the stage. It clears a physical barrier (CO2) so extraction starts evenly. When it goes well, the cup tastes more clearly of its origin: Kenya’s blackcurrant snap, Ethiopia’s jasmine lift, Colombia’s tropical sweetness.
Tomorrow, don’t change five things. Change one: bloom ratio (2:1 vs 3:1) or bloom time (30 vs 60 seconds). Write it down. Taste slowly as it cools, when the honeyed sweetness and gentle florals have room to show up.