Disclosure: This post contains paid Amazon links. As an Amazon Associate I earn from qualifying purchases.
For hot filter coffee, about 195–205°F (90.5–96°C) is a common starting range; the SCA’s brewer certification standard specifies water in the 92–96°C (197.6–204.8°F) range during brewing. As a practical roast-level heuristic, lighter roasts often benefit from starting toward the hotter end, while darker roasts may taste better brewed cooler. These are starting points, not fixed rules: recipe, coffee, equipment and taste matter.
Water temperature is one of the most misunderstood variables in coffee brewing. Temperature errors are a common cause of disappointing home brews, yet many home brewers have never measured their water temperature.
Temperature affects how quickly coffee extracts, but sourness or bitterness alone does not diagnose a temperature problem. Grind size, dose, water, brew time and brew strength also matter. This guide covers practical starting points and ways to adjust your brew.
How Temperature Drives Extraction
Understanding Solubility Dynamics
Brewing dissolves and carries soluble material from ground coffee into water. Water temperature affects the rate of extraction, but it is one variable among several; grind size, contact time, brew ratio and agitation also affect the cup.
Hotter water generally speeds extraction. It does not extract flavor compounds in a simple fixed sequence, and there is no single temperature that separates pleasant flavors from harsh ones. Adjust temperature alongside the other recipe variables and taste the result.
What Shapes the Cup
It is tempting to describe extraction as a fixed sequence of acids, sugars and bitter compounds, but the process is more complex. Brew strength, extraction yield and personal preference all shape how a cup tastes.
- Temperature changes the rate of extraction.
- Grind size, brew ratio and contact time also change extraction and flavor.
- Use taste and a repeatable recipe to decide what to adjust.
A few degrees can change how quickly a brew extracts, but the resulting flavor depends on the full recipe. Small temperature changes do not guarantee a particular flavor change.
The Standard Range: 195-205°F
Why This Range Exists
The SCA brewer certification standard specifies 92–96°C (197.6–204.8°F) during brewing. This is a brewer performance standard, not proof that every coffee tastes best at a particular temperature. In a UC Davis study of drip coffee, tasters found little sensory difference among brews made at different temperatures when brew strength and extraction were held similar. Temperature still affects how quickly those targets are reached.
At about 195°F: This is near the lower end of common hot-brew starting ranges. It may work well for some coffees and methods; it is not a universal light-roast setting.
At about 205°F: This is near the upper end of common hot-brew starting ranges. It can be a useful starting point for a dense light roast, but hotter water does not guarantee better extraction or flavor.
The Roast Level Connection
Roast level can help guide your first temperature choice. Lighter-roasted beans are often less soluble, so brewers commonly start hotter; darker roasts extract more readily, so a cooler start may help avoid an overly roasty cup. Research does not establish one required temperature band for every roast.
| Roast Level | Temperature Range | Why This Range | Best For |
|---|---|---|---|
| Light | 200-205°F (starting point) | Often less soluble; try the hotter end first | Single-origin, fruity/floral notes |
| Medium | 195-202°F (starting point) | Begin near the middle and adjust to taste | Versatile, forgiving for experimentation |
| Dark | 190-198°F (starting point) | Often extracts readily; try a cooler start if the cup tastes harsh | Rich, bold flavors without harshness |
Temperature by Brewing Method
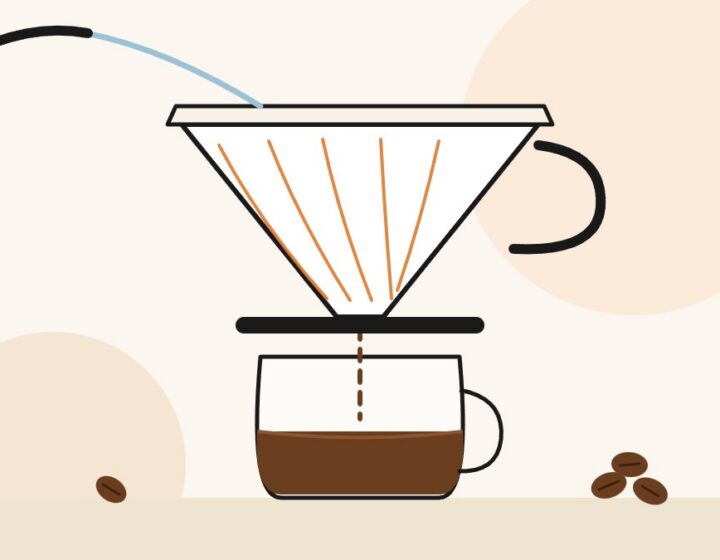
Pour-Over
Pour-over methods offer the greatest temperature control, making them ideal for exploring extraction nuances.
Common Starting Range: 195–205°F
Starting Point: 200°F for medium roasts
Adjustment Strategy: If the cup tastes off, consider grind size, brew ratio, time and temperature. Change one variable at a time; taste alone does not identify the cause.
Tip: Follow a recipe suited to your dripper and coffee. Water cools during a pour, but you do not need to create a deliberate temperature gradient to extract different compounds.
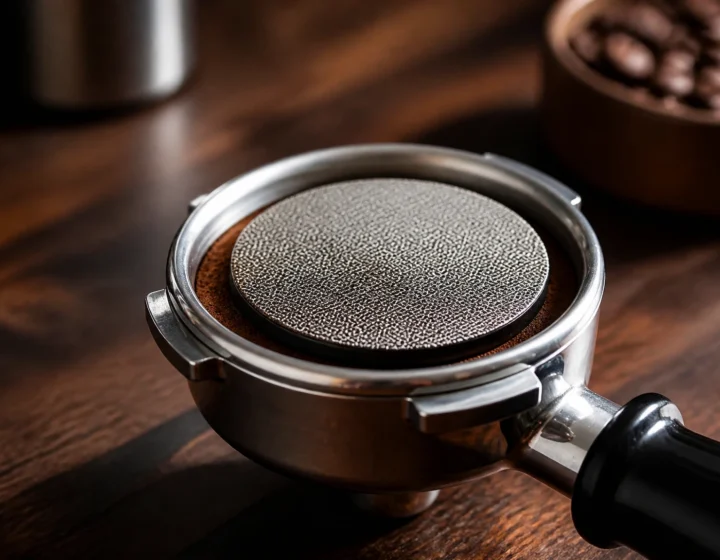
Espresso
Espresso machines control brew temperature differently from kettles and filter brewers. The appropriate setting depends on the machine, coffee and recipe.
Starting Point: Use the machine maker’s recommended setting or a tested recipe; espresso does not have one universal temperature range.
Adjustment: Some espresso recipes use a lower temperature for darker roasts and a higher one for lighter roasts, but pressure alone does not require a lower temperature.
Machine Considerations: Account for temperature loss through group head and portafilter thermal mass
French Press
For French press, start with a trusted recipe and preheat the press if heat loss is a concern. Contact time and grind size affect extraction as well as temperature.
Starting Point: Around 195–205°F is a common hot-brew starting range; adjust to the coffee and recipe.
Recipe note: A longer steep does not by itself mean the temperature must be lower. Follow a consistent recipe and adjust based on taste.
Heat Retention: Preheating the press can reduce heat loss. A drip brewer and a French press are different methods; choose equipment for the method you want to brew.
Cold Brew: The Temperature Exception
Cold brew uses cool or room-temperature water and a longer steep than hot brewing. Temperature still matters, and recipes vary by steep time, grind and dilution.
Temperature: Cool or room-temperature water; refrigerator and room-temperature recipes both exist.
Extraction Time: 12-24 hours
Result: Cold brew often tastes different from hot-brewed coffee, but its flavor depends on the beans, grind, water, brew time and dilution.
Measuring and Controlling Coffee Extraction Temperature
Tools for Measuring and Controlling Temperature
Instant-Read Thermometer: The main tool for checking water temperature. Look for models with 1-2 second response times and ±1°F accuracy. For more detail, see our guide to choosing the perfect coffee thermometer that balances accuracy, speed, and durability.
Variable Temperature Kettle: Electric kettles with precise temperature control eliminate guesswork and provide consistency.
Thermal Carafe: Keeps brewed coffee warm for serving. It does not control the water temperature during brewing.
Temperature Measurement Techniques
Water Temperature: Measure as close to the coffee bed as practical. Water cools as it travels and contacts equipment, but the amount varies with the kettle, pour, room and brewer; do not assume a fixed 5–10°F drop.
Ambient Considerations: Cold equipment and rooms can increase heat loss. Preheating may help. Do not exceed the equipment’s limits to compensate.
Equipment Preheating: Preheating a cold dripper or carafe can reduce heat loss, especially when you want a consistent hot brew. Follow your brewer’s instructions.
Advanced Temperature Techniques
Temperature Profiling
Some brewers experiment with changing temperature during a brew, but specific temperature profiles are recipe-dependent and do not guarantee extraction of particular flavor compounds.
Bloom: Use the water temperature and bloom time in your chosen pour-over recipe. There is no general need to start the bloom 5–10°F hotter.
Main Pour: Keep the recipe consistent while you evaluate the cup.
Final Pour: There is no general requirement to lower the water temperature during the final pour.
Roast-Specific Temperature Protocols
Light Roast Protocol:
- Starting water temperature: about 200–205°F
- Use a tested recipe for bloom, pouring and total brew time
- Adjust one variable at a time to suit the coffee and dripper
Medium Roast Protocol:
- Starting water temperature: about 195–202°F
- Use a tested recipe for bloom, pouring and total brew time
- Adjust one variable at a time to suit the coffee and dripper
Dark Roast Protocol:
- Starting water temperature: about 190–198°F
- Use a tested recipe for bloom, pouring and total brew time
- Try a cooler temperature if the cup tastes overly roasty, while keeping other variables steady
Troubleshooting Temperature-Related Issues
Common Mistakes to Avoid
Temperature control pitfalls:
- Assuming kettle and brew-bed temperatures are identical
- Forgetting that cold equipment can cool the water
- Ignoring altitude when water cannot reach the usual range
- Assuming one temperature suits every coffee and recipe
Diagnosing Temperature Problems
Taste tells you which way to adjust.
Sour or weak coffee: Can have several causes, including grind size, brew ratio, time and temperature. Do not assume temperature is the problem.
- Try: Change one variable, such as a finer grind or slightly longer brew time, then taste.
- If changing temperature, move it a few degrees and keep the rest of the recipe steady.
Bitter or harsh coffee: May reflect roast character, extraction, brew strength or personal preference; temperature is only one possible factor.
- Try: Change one variable, such as a coarser grind or shorter brew time, then taste.
- If changing temperature, move it a few degrees and keep the rest of the recipe steady.
Inconsistent Results: Temperature fluctuations can contribute, but dose, grind, pouring and other changes can also affect the cup.
- Try: Repeat the same recipe and equipment routine before buying new gear.
- Then: Measure temperature if you suspect it is changing, and adjust one variable at a time.
Environmental Factors
Altitude: Water boils at a lower temperature at higher elevations. If it cannot reach a suggested target, use the hottest safe water your equipment can provide and adjust the rest of the recipe to taste.
Seasonal variations: Cold equipment can cool brew water faster. Preheat it and keep your method consistent before making recipe changes.
What to Buy First
Equipment Investment Priorities
- Start with a repeatable recipe: A thermometer is optional if you want to check water temperature.
- Consider a variable-temperature kettle: Useful for testing small adjustments, but not required for good coffee.
- Choose the brewer for your method: A certified drip brewer meets a performance standard; it does not guarantee that you will prefer its coffee.
Is It Worth It?
A thermometer or temperature-controlled kettle may help if temperature variation is limiting your experiments. Potential benefits include:
- More repeatable temperature measurements
- A simpler way to test small recipe changes
- Useful feedback when temperature is the variable you are investigating
A Four-Week Plan for Dialing In Temperature
New to temperature control? Start here:
- Choose a consistent recipe for your method.
- Measure your water temperature if you have a thermometer.
- Use one starting temperature and record the result.
- Change temperature by a few degrees while keeping the other variables steady.
- Keep the recipe you prefer.
Week 1: Baseline Establishment
- Measure your current brewing temperatures
- Document flavor results at different temperatures
- Identify your equipment’s temperature characteristics
Week 2: Systematic Experimentation
- Test 3°F increments within the optimal range
- Keep detailed tasting notes
- Identify your personal preference patterns
Week 3: Method-Specific Optimization
- Apply learnings to different brewing methods
- Adjust for different roast levels
- Develop your personal temperature protocols
Week 4: Consistency Development
- Focus on repeatable processes
- Refine measurement techniques
- Build muscle memory for optimal temperatures
Frequently Asked Questions
What happens if coffee water is too hot?
Water hotter than the common filter-brewing range is not automatically a failed brew. Higher temperature speeds extraction, so adjust grind, time and ratio as needed. Flavor depends on the coffee and the final brew, not on crossing one universal “bitter compounds” threshold.
What temperature should I brew coffee at home?
For hot filter coffee, start around 200°F. If brewing a light roast, you can try the hotter end of a common range; for a dark roast, try cooler. These are heuristics, not universal targets. Measure consistently and adjust the recipe to taste.
Does coffee brewing temperature affect caffeine?
Temperature affects extraction rate, but the amount of caffeine in a cup depends on more than brew temperature, including coffee dose, bean type and recipe. Do not expect a small temperature adjustment to reliably change caffeine content.
How do I know how to extract coffee at the right temperature?
Use a thermometer or temperature-controlled kettle if you want to measure brew water. Start with a consistent recipe, taste the result, then adjust one variable at a time. If changing temperature, try a small change and record what you did.
Conclusion
Temperature is one useful brewing variable, but it is not a standalone guarantee of a better cup.
Temperature affects how quickly coffee extracts. Measure it if helpful, but also pay attention to grind size, ratio, time and the taste of the finished brew.
Your Next Steps:
- Choose a consistent recipe for your brew method.
- Record the water temperature if you can measure it.
- Change one variable at a time and keep the version you prefer.
The right temperature is not a fixed number. It depends on your coffee, your method, your equipment and your taste, so treat the ranges here as starting points and adjust from there.
Sources
The SCA’s Certified Home Brewer program describes brewer performance standards. A UC Davis Coffee Center study discussed by the Specialty Coffee Association found little sensory impact from brew temperature alone for drip coffee when brew strength and extraction were held similar, within the temperatures tested. Roast-specific temperatures in this article are practical starting heuristics, not official SCA roast-level standards.